"Barkeep, this round is on me"

How you can do good toward your fellow man, and end up with some quality apps for yourself.

-----

Update March 1st:

I sold 341 apps during February. After subtracting income taxes a donation of $143 was made, providing 20 years worth of clean water for 7 people.

My thanks to all who helped by purchasing apps. The charity runs through March, you can donate directly at http://developersagainstpoverty.org/.

-----

Living in a town which sees more than 100 rain days per year, I find it hard to imagine what it must be like not to have access to clean and safe drinking water. Sadly there are people on this planet for whom clean water is an unattainable luxury.

Unsafe water and a lack of basic sanitation kill more people every year than every form of violence on the planet, including the wars raging around the globe.

This is a fact I learned after tuning in to this week's episode of the chat show iDeveloper Live, where Scotty (the show host) has launched Developers Against Poverty — a campaign asking software developers to help bring clean water to areas of the world that lack it.

After hearing about this initiative, and then being inspired by Baked Ham Games' pledge to donate a percentage of their app sales, I have decided to support the effort as best I can.

Therefore;

I hereby pledge to donate 100% of my February profits from the app store to the cause championed by Developers Against Poverty.

The donation will be made during the first week of March, as soon as the February sales numbers are in.

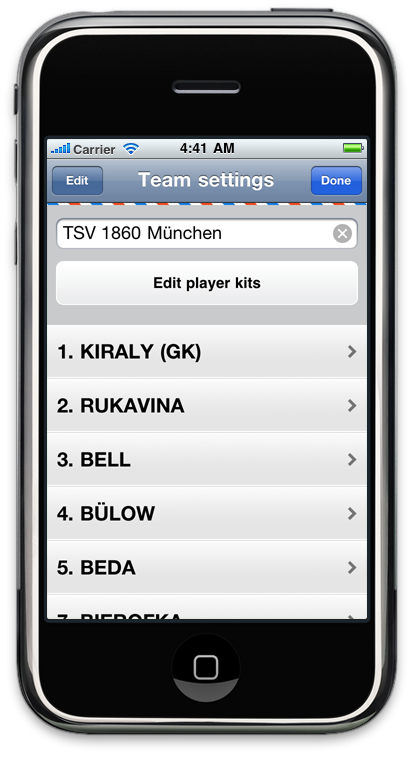
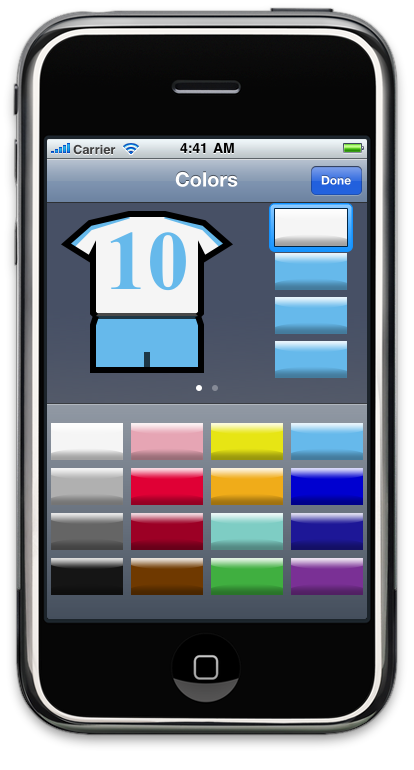
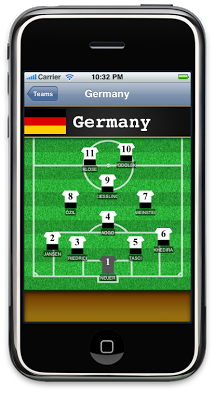
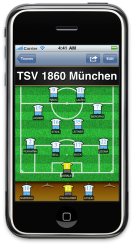
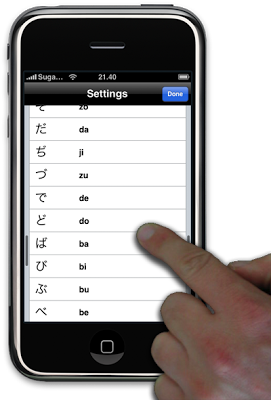
So if you are at all interested in football (soccer if you're American) or perhaps want to study some Japanese, I hope you will join me in supporting this noble cause by buying some apps, which coincidentally are all currently on sale.

Even if none of my apps appeal to you, do consider donating directly to the Developers Against Poverty charity campaign.

Installing Leopard on the G4 Cube

The PowerMac G4 Cube, arguably the coolest computer on planet Earth, is not supported by operating systems later than Mac OS X 10.4 Tiger, but there are many reasons you may want to run a later system. For me the main incentive to upgrade was that Apple dropped Tiger support with the release of iTunes 10, which means a Cube on 10.4 can not partake in the wonders of Home Sharing.

The minimum system requirements for installing Leopard on a PowerPC based Mac is an 867 MHz processor and 512 MB of RAM. The memory requirement isn't really a problem since the Cube supports up to 1.5 GB, and you wouldn't want to run Leopard on any less than 512 MB anyway. The processor speed requirement, however, is a problem since the fastest (unmodified) Cube runs at 500 MHz. Luckily there is a way to fool the Leopard installer's system requirements check by temporarily modifying the processor speed reported by the firmware.

Back up your Tiger

First off you'll want to create a bootable backup of your internal disk on a firewire drive. Do this using SuperDuper! or a similar tool, and make sure you can really boot from the backup drive.

No really, do not go on until you have successfully booted from your backup and made sure it works.

Set the startup disk

Put your Leopard installation disk in your DVD slot, or copy it onto a firewire drive if your Cube can't read DVDs. Then set the installation disk as your Startup Disk in the System Preferences so that on next restart your Cube will boot from it and start the installation.

Modify Open Firmware

Restart your Cube, and hold Cmd-Opt-O-F during boot to enter the Open Firmware prompt. You will now temporarily set the reported CPU speed to 867 MHz and then continue booting. To accomplish this you will type some commands on the prompt, Open Firmware will respond with an 'ok' message after each understood command. The reported speed will revert back to the original value after next reboot.

For single CPU systems type the following three commands exactly as shown.

dev /cpus/PowerPC,G4@0

d# 867000000 encode-int " clock-frequency" property

mac-boot

For dual CPU systems use the following five lines.

dev /cpus/PowerPC,G4@0

d# 867000000 encode-int " clock-frequency" property

dev /cpus/PowerPC,G4@1

d# 867000000 encode-int " clock-frequency" property

mac-boot

Continue with the installation normally, and eventually end up with a Leopard Cube.

Thanks to MacRob on CubeOwner.com for turning me onto this solution.

Retro gaming on iPad, for iOS developers

MADTV and Gabriel Knight running in dospad on the iPad

MADTV and Gabriel Knight running in dospad on the iPad

Sometimes it's good to take a break from coding, and what's more relaxing than running some retro games on your iPad?

Getting DOS onto iPad

Some time ago a DOS emulator called iDOS briefly made it into the App Store, but it was already long gone when I heard of it and tried to download it. As luck would have it the source code for the app is available under the name dospad from Google Code, so any registered iOS developer can build it using Xcode and run it on their iPad.

I believe iDOS or dospad is also available for jailbroken iPads, for those who are not registered developers but are OK with jailbreaking their device.

Installing games

With dospad you get a fully functional DOS system for your iPad. There is mouse support and sound support, making it brilliant for some retro gaming. If the games are mouse driven you can even go full screen for a very immersive experience.

Sierra's adventure game Gabriel Knight is one of my all time favorites, and since I no longer have a floppy disk drive on my computer I downloaded it from an abandonware site called The House of Games, where there's a large selection of old DOS games.

With dospad installed on your iPad, you can drag files into it using iTunes. Just go to the iPad's Apps tab and select dospad under the File Sharing header.

Dospad comes with an unzip utility so once you have transferred the zip file with your game you can use the DOS command prompt to create a directory and unzip the file into it.

For Sierra games you then run install.exe to select your sound options. I selected Soundblaster Pro which seems to work well.

Launch the game by running sierra.exe.

Mouse controls

Obviously, this being DOS, you don't use it like a standard touch screen. Instead you control a mouse cursor on screen in the same manner you would using the touchpad on your Macbook. Tapping the screen left clicks at the position the cursor points to.

You can play either in portrait or landscape mode, as well as full screen.

Happy retro gaming, and make sure to save your game often.

Add your own teams to Starting 11

Version 2.0 of Starting 11 was just submitted for App Store review and should be available on the store shortly.

New features

The new version lets you add any number of your own favorite teams and players.

Formations you prepare are stored for future modifications, meaning you don't need to start over from the beginning the next time you want to prepare a starting eleven.

How to get it for free

Version 2.0 will be priced at $2, but it is a free upgrade for users of version 1.0. So if you haven't yet downloaded Starting 11 you can get 2.0 for free by acting now, before it goes online at the store.

App store link

The evolution of an iPhone app interface

I recently released Starting 11, an iPhone app in which you can pick your own football team line up and share it via e-mail and Facebook.

From idea to app store submission took about 10 evenings of work. The lions share of that time was spent perfecting the user interface. Below are the design iterations from idea to App Store release, click the images for full versions.

Since I had the idea for this app just before the FIFA World Cup started, I quickly decided to use the Xcode template "Navigation-based Application" to simplify development, hoping to get it published before the World Cup had finished. By focusing on polishing the pitch view, which would be the view where the user spends most of his time, I figured I would get the most bang for my efforts.

Initial idea sketch

Using the brilliant and free Adobe Ideas app on my iPad i quickly sketched the basic UI and zoomed the resulting image to match the size of my iPhone. This gave me a feel for the size of the UI components, allowing me to decide that it would be feasible to have a full football team on screen at once.

Grass and scoreboard

To generate the grass for the pitch I followed Andrew Houle's Photoshop tutorial, ending up with a huge image of grass texture. My brother graciously provided me with the chalk lines marking the pitch and with the scoreboard graphic which has a nice detailed mesh effect only visible with the extra resolution available on the iPhone 4.

Player kits

I had decided to represent the players on the pitch by having their jerseys show the number on the back, the name would appear beneath. My first effort used a combination of rectangular UIViews to create the illusion of the jersey. I was hoping this would allow me to save time, but it just didn't look good enough to match my vision for Starting 11.

I had to implement my own UIView subclass to handle drawing the player using vector graphics. This allowed me to create something that more closely resembled a jersey.

I also decided to add a dark background to the player names.

After using the app in this state for some time I decided that the shoulders needed to be more rounded, and that a black outline around the player added some needed contrast, especially important when using the application outdoors in the sun. For the same reason the color behind the player name was darkened.

I also added a small line to indicate the separation of the player's legs, without which it looked like the players were wearing skirts.

Finally the flags for all countries had some shine added to them, then the Share button was added and I decided that instead of having the team's name appear on screen twice the navigation bar should contain the application's title.

And there you have it, the UI of version 1.0 of Starting 11. What do you think? What would you change?

Looking forward

After the World Cup is done and we have a new world champion team, the next step will be to add the possibility for customers to add and modify teams. This will make the app useful for the club competitions that start up after summer.

Regarding the iPad I think Starting 11 would be a wonderful fit for the larger screen, so I plan to make it a universal app that supports both the iPhone and the iPad form-factors.

Until these steps are done the app will remain free. I will eventually start charging.

Starting 11 for iPhone in HD

It has yet to be listed in the App Store, but I'd like to introduce you to my latest effort. Starting 11 is an app developed for the ongoing FIFA World Cup.

You choose which team you want to manage and position the players on the pitch in the formation you prefer. You can then share the resulting lineup via e-mail or Facebook.

Starting 11 has been in review at Apple for a over a week already so it should hopefully go live shortly.

Retina Display ready

This is my first attempt at an app supporting the full resolution of the Retina Display of iPhone 4. The difference in detail level is simply astounding, as you can see for yourself below.

Click the image for full size comparison.

On the iPad App Store from day one

I have just learned that my first iPad app has been approved by Apple and will be available from the App Store on opening day.

A Memory Game gives you the opportunity to practice your memory by trying to find and match pairs of cards together. The first version features the two card decks Flags and Symbols.

Once the store is online you will be able to download A Memory Game for free [iTunes link].

iPhone Video Output

There are a couple of options available when preparing to perform a demonstration of an iPhone app to a larger group of people. All these options have flaws, however. The "gather around" method, for example, doesn't work well for groups of more than a few people. Any more and you would ideally want to project the iPhone screen contents onto a big screen.


The "iPhone simulator method" is probably the most used method. It's simple to set up but limits your app navigation to the mouse, making multitouch gestures difficult to perform. Also, there is no way to show off accelerometer functionality like "shake to undo".
The "camcorder method" avoids the simulator's issues, but can be a hassle to set up. It also restricts your movement as you have to make sure to keep the device on screen and avoid reflections as best you can.

Doing it Steve's way
Why don't we take a page out of Steve Job's playbook and mirror the iPhone screen directly from the device onto the big screen?
Sadly this is not straight forward. So far only the iPod application supports video output via Apple's AV cable, at least that's what I thought until I stumbled upon Rob Terrell's iPhone App Video Mirroring blog post (go read it now, I'll wait).

Using the private MPTVOutWindow class in the MediaPlayer.framework API, Rob's code mirrors the iPhone screen onto the AV cable. For demonstration purposes this is a great solution, but being based on a private API it should not be left in the app when submitting it to the App Store.

Originally the code did not support on-the-fly orientation changes and touch indicators, both of which I needed. Thanks to Rob posting the source code I was able to implement these changes and have since submitted the updated code back to him, although I haven't heard back after doing so.

Get your hands on the code
In the spirit of sharing I have prepared a sample project, TvOutputSample, which shows you how to add video output to an Xcode project. This is the application shown in the video above, it should build and run out of the box, using iPhone SDK 3.0.

Download the code: TvOutSample.zip
[UPDATE: The project has moved to github]

I should mention that since the video mirroring is software based it affects application performance somewhat. On an original iPhone 10 fps works well, on an iPhone 3GS I have had no problems running at 20 fps. The fps setting is near the top of the UIApplication_TVOut.m file, do your own tests to see what works best for your app and hardware.

The current version (as of October 2009) of the code does not support OpenGL video output.


How Apple can improve iPhone scrolling

I want to mention a UI issue I have with the iPhone OS implementation of scroll indicators, the unobtrusive bars that appear on the right side of the screen when scrolling through a list.

My hand obscures the scroll indicator

Like most people, I tend to use my right hand to interact with the iPhone. This means that my hand obscures a large part of the extreme right of the display, making it hard to see how far down the list I have travelled.

Proposed UI enhancement

My proposal is to have the scroll indicators appear on both sides of the screen.

The effect is illustrated in the photoshopped screenshot below, based on the settings screen in my Hiragana application.

Note how the scroll indicator appears on both the left and right sides

Note how the scroll indicator appears on both the left and right sides

Is this really a problem?

This issue tends to bother me the most while reading longer articles at RoughlyDrafted Magazine or Daring Fireball. I often want to quickly check how far I have to go, in order to decide if I have time to finish the article or if I should save it for later.

In these cases the scroll indicator tends to be pretty small and a fair distance down the screen, right where I am least likely to easily see it.

What about panning?

Mobile Safari, and other applications that allow you to pan around a larger view in two dimensions use a horizontal scroll indicator in the lower part of the screen. This can can also be partly obscured by your hand, and should thus be supplemented by a scroll indicator across the top of the screen.

Speculation on the scroll indicator's background

I suppose Apple's decision to limit the scroll indicators to the right and bottom of the screen is based on how scrolling works in the classic desktop applications where scroll bars remain on screen whether in use or not.

To minimize wasted screen real estate and avoid UI clutter, it makes sense in a desktop application to chose a single place to present the scroll bar. The standard seems to always have been to place it on the right, and along the bottom for horizontal scrolling.

However on the iPhone scrolling works differently. There is no screen real estate wasted by showing the indicators on both sides since they are only visible while you are scrolling.

The appeal

So Apple, please add support for dual scroll indicators. It just makes sense.

Hiragana, Katakana and the WWDC Wall of Apps

At WWDC there was a really cool wall of apps, which used 20 Apple Cinema Displays to show the icons of the 20,000 most popular iPhone apps, and illuminate them whenever they were downloaded from the App Store. Pretty neat!

Greg Pascale, a student at Brown University, made a Photosynth of the whole wall, allowing us to study it in detail. I took the opportunity to look for my applications, and found them at the far right of the wall.

I can hereby claim having had a presence at WWDC '09. Sweet!

10 000 App Store Downloads

As of the latest available weekly sales report on iTunes Connect, the number of downloads for my three iPhone applications have passed 10 000!

The apps are Hiragana Lite (free), Hiragana ($2.99) and Katakana ($2.99).

I am amazed at the success of these admittedly simple applications and would like to extend my sincerest thanks to my customers, especially those who have left feedback and pushed me to improve the apps.

The numbers

(click to view large version)

(click to view large version)

The vast majority of downloads have naturally been for the free version Hiragana Lite. However with just under 10% of the total downloads, the paid apps have together been able to edge over the 1 000 downloads line. This is way beyond my wildest hopes.

The explosion of Hiragana Lite downloads makes the sales lines for the paid applications look almost flat. But if we disregard the Hiragana Lite downloads and look closer at the sales of the paid apps, combining their numbers, we notice something interesting.

Don't let the changed scale on the y-axis in the following graph confuse you, it goes to 1000 instead of the 9000 shown in the graph above.

Before the release of the free version the sales trend had been declining after the first few weeks. It looks like it was about to go flat right around 500 sales. However since Hiragana Lite has been available sales have picked up and have held remarkably steady.

My conclusion to this is that it is a very good idea to make a free version of your app available, letting potential customers try before they buy.

A second conclusion is that I should probably set aside some time to develop a few more apps.

---

*Note that these numbers do not include updates, only new customer downloads are counted.

Using Mono for .NET development on the Mac

Yesterday I decided to install Mono onto my MacBook to enable .NET development. Below I have listed the steps I took to accomplish compiling and running a Windows Forms hello world style application and packing it into an app bundle so I can run it by double clicking the icon.

The reasons for doing this are twofold;

* I spend most of my time at work professionally developing .NET applications using Visual Studio, so obviously I'm interested in using .NET also on the Mac.

* I'm thinking of writing an experimental Push Notification Service backend in .NET and would rather avoid having to launch Windows to do this.

Requirements

Leopard (Supposedly works on Tiger as well, but then you need to install X11 to make Windows Forms applications work)

Installation

1. Get Mono for Mac from the Mono Project website. I grabbed version 2.4, the latest stable version as of this article's publication.

2. Run the installer. Mono installs under '/Library/Frameworks/Mono.framework'.

Hello World on the command line

3. Compile a command line hello world tool:

hello.cs file contents

// Compile with %> gmcs hello.cs
using System;
public class HelloWorld
{
static public void Main ()
{
Console.WriteLine ("Hello Mono World");
}
}

Compile using the 'gmcs hello.cs' terminal command.

4. Run using the 'mono hello.exe' terminal command. The 'Hello Mono World' message should be printed.

Windows Forms Hello World

5. Compile a Windows Forms hello world app tool.

helloforms.cs file contents

// Compile with %> gmcs helloforms.cs /r:System.Windows.Forms.dll
using System;
using System.Windows.Forms;
public class HelloWorld : Form
{
static public void Main ()
{
MessageBox.Show("Hello Mono World");
}
}

Compile using 'gmcs helloforms.cs /r:System.Windows.Forms.dll'.

6. Run using the 'mono helloforms.exe' terminal command, and if all is well a message box should be displayed.

Creating an app bundle

7. Use MacPack to package the .NET assembly into an app bundle, which can be launched from the Finder.

'macpack -n:HelloForms -a:helloforms.exe -o:. -m:winforms' on the command line.

8. Launch the app bundle HelloForms.app from the Finder to make sure it works.

That's it really. You are now ready to start development on your enterprise level .NET project using Mono on your Mac.

Additional tips

* MacPack has a really good man page documenting its use.

http://linux.die.net/man/1/macpack, or just 'man macpack' on the command line.

* Simplified compilation using pkg-config

Note that using pkg-config (see if it's setup on your system by running 'pkgconfig' on the command line) you can compile the forms app using 'gmcs helloforms.cs -pkg:dotnet' instead. Not a big difference in this example, but not having to list all needed assemblies will help when compiling more complex projects.

For .NET 3.5 compatibility, you would use the -pkg:dotnet35.

To set it up, add the following line to the '~/.bash_profile' file, if the file does not exist create it:

export PKG_CONFIG_PATH=/Library/Frameworks/Mono.framework/Versions/Current/lib/pkgconfig/

References

Windows.Forms and Mac OS/X
http://oepapel.blogspot.com/2005/04/windowsforms-and-mac-osx.html

Mono Basics
http://mono-project.com/Mono_Basics

Customizing Terminal when Compiling Mono apps
http://dotmac.rationalmind.net/2008/12/customizing-terminal-when-compiling-mono-apps/

Archive for the 'firefox' Category
(contains info about pkg-config)
http://wp.colliertech.org/cj/?cat=9

iPhone SDK development on multiple computers

Sometimes it's good to be able to use several computers to develop your iPhone app. In my case my main development machine is the iMac, but summer is coming up and I may not want to stop developing just because I go out of town. Luckily I have a MacBook, on which I have also installed the iPhone SDK.

In order to test on the device when I develop using the MacBook I have to move my certificate, private key and provisioning profile to it. Here's how I do that.

1. Launch Keychain Access on the iMac (main development computer).

2. Under the Keys category I Ctrl-click the private key that has the certificate for 'iPhone Developer: ' attached to it.

3. In the context menu select 'Export ...'.

4. When saving provide a password, which will be required for importing on the other computer.

5. A .p12 file was saved, transfer it to the target computer.

6. Grab the development provisioning profile (either by downloading from the iPhone Program Portal or by grabbing the right one from ~/Library/MobileDevice/Provisioning Profiles/) and transfer it to the target computer.

7. Double click the .p12 file on the target computer. If you provide the correct password the key and certificate will be installed into the Keychain on the target computer.

8. Drag the provisioning profile onto the Xcode dock icon.

The application can now be installed on the device from the target computer, which in my case is the lovely black MacBook.

Not announcing the Kinetic Battery Charger app

I had hoped to announce the release of my latest iPhone application on the App Store, sadly that's not happening here.

Lately I've been experimenting with the built in accelerator and wanted to put the code to use in an actual app, so I decided to make an app which simulates charging the phone battery when you shake it. Like you would shake your kinetic wristwatch to keep it running.

I designed a battery graphic and added a bar that grows when the phone is shaken to simulate charging. I thought it turned out really well, and the people I've shown it to have said it's hilarious even though they weren't fooled for long.

I submitted the application as a freebie to the Entertainment category on the App Store, but it turns out Apple's reviewer didn't find it entertaining. Instead I received a letter stating that it wouldn't be allowed on the store.

Unfortunately, your application, Kinetic Battery Charger, cannot be added to the App Store because it uses standard iPhone screen images in a non-standard way, potentially resulting in user confusion. Changing the behavior of standard iPhone graphics, actions, and images, or simulating failures of those graphics, actions, or images is a violation of the iPhone Developer Program agreement which requires applications to abide by the Human Interface Guidelines.

Now this is obviously a form letter as I am not using any standard iPhone screen images at all, except for the info-button which works as expected by revealing a settings screen. I sent a reply stating this fact but have not heard back.

I also spent a few hours poring over the Human Interface Guidelines in search for anything explaining why my application would not be acceptable but came up empty handed.

I find it a little frustrating that the feedback you get from the App Store reviewers doesn't contain any actual information about what they are objecting to. How hard can it be to take a screenshot of the application and draw a circle to point out the offending piece?

Oh well, back to updating the apps I already have on the store, that will hopefully be time better spent.

CodeSign error: a valid provisioning profile is required for product type 'Application' in SDK 'Device - iPhone OS 2.0'

Lately I've been working on adding some improvements to my Hiragana iPhone application, which I expect to submit to the App Store any day now.

This post, however, is not about amazing new features. Instead it's about a problem I ran into when compiling for Ad Hoc Distribution. Instead of the expected Succeeded message Xcode gave me the error message CodeSign error: a valid provisioning profile is required for product type 'Application' in SDK 'Device - iPhone OS 2.0'.

None of the classic tricks of restarting Xcode and cleaning the build had any effect. After banging my head against the screen for a while (that iMac screen is surprisingly sturdy) I was finally able to figure out that my project file wasn't set up to use the provisioning file I had installed on the system.
 
Since last compiling the application I have added a few new devices to my Ad Hoc provisioning profile. This appears to have surprised Xcode somewhat since it did not update the project file with the new provisioning identifier.


Here are the steps that worked for me, perhaps they'll come in handy for someone else as well:

1. Go to ~/Library/MobileDevices/Provisioning Profiles and open your Ad Hoc provisioning file in a texteditor, I used Smultron.
2. Find the section that looks like this
<key>UUID</key>
<string>xxxxxx-xxxx-xxxx-xxxx-xxxxxxxxxxxx</string>
3. Copy the identifier string.
4. Go to you project directory and make a backup copy of your MyProject.xcodeproj file.
5. In the Finder right click and select Show Package Contents on your MyProject.xcodeproj file.
6. Open the project.pbxproj file with your text editor. 
7. Find all rows containing "PROVISIONING_PROFILE[sdk=iphoneos*]" = "xxxxxx-xxxx-xxxx-xxxx-xxxxxxxxxxxx"; that appear in an Ad Hoc section.
8. Replace the assigned value with the provisioning file's identifier, which you copied earlier.
9. Save and launch Xcode to try to build.

This worked for me. I hope it works for you if you run into the same problem. 


Analyzing App Store sales for 2008

Way back in October I wrote a post analyzing the sales data from the first three weeks of my applications in the App Store. Things were looking good, with over 250 sales in those three weeks.

Now that we're a little bit into 2009, it's time to take a look at how the sales performance evolved over the rest of 2008. Interestingly the combined sales of the 13 weeks since my previous report have failed to even equal those of the three initial weeks.

Click the images for higher resolution.

Sales Growth

All in all my two apps, Hiragana and Katakana, racked up a total of 467 sales during 2008. As can be seen the sales have leveled off to just a few per week, it will be interesting to see if the release of the free Hiragana Lite has any effect going forward.

Biggest Markets

Like before just under half the sales were generated through the US App Store, with Germany coming in second.

Payout

So far the sales have generated the following payouts:

$ 609

€ 207

¥ 5690

It seems Apple don't strictly follow the $250 minimum revenue per region rule before paying out. The Japanese amount above is way less than $250, and the dollar amount actually includes three separate payouts of $430, $91 and $88 respectively.

Announcing Hiragana Lite

I have decided to make a free version of my japanese study aid application, Hiragana available on the iPhone App Store.

This free version is exactly like the paid version except for 3 small differences:

  1. It's called Hiragana Lite.
  2. It contains the 46 basic hiragana characters, as opposed to the full set of 104 hiragana caracters available in the full version.
  3. Buttons on the info screen which open the App Store using the technique described in my earlier post Launching the App Store from within your iPhone application.

I'd be very happy if you gave it a try and leave me your feedback.

Hiragana Lite (App Store link).

I have also decided to mark the occasion by lowering the prices for the full versions of Hiragana and Katakana to $2.99.

Phil Schiller and the case with the missing menu bar [Updated]

I just watched the video stream of Phil Schiller giving the Macworld keynote presentation.  I am as usual hugely impressed with the software Apple churns out, this time the addition of face detection and recognition to iPhoto was my personal favorite new feature. Look out Phil, $79 is coming your way.

The one thing, though, that stuck in my mind more than anything about the presentation was the mysteriously missing Mac menu bar in the demo of the new iWork.com service.

First Phil prepared a document for sharing using Pages on his computer.

Phil with the menu bar

Phil with the menu bar

He then switched to the fictional user Tia's computer to show us what she would experience on the receiving end. Tia's computer however didn't have the Mac menu bar at the top of the screen.

Look, no menu bar

Look, no menu bar

I have had a slight look around to figure out how to hide the menu bar in Leopard, but to no avail. This begs the question, can it be done or was Phil not using Leopard in the demo?

By the way, good news about all iTunes songs being DRM free! Finally I can commence my long planned iTunes shopping spree.

UPDATE: The iWork.com demo starts at 1.01.20 into the video stream.

Launching the App Store from within your iPhone application

Today I decided to figure out how to launch the App Store application from within an iPhone application using the SDK.

It turns out this is pretty simple, but you have to beware of a few issues.
  • First and foremost, it doesn't work from the iPhone Simulator, in all probability since the App Store application is not available on the simulator.
  • Second you need to provide a valid URL to an application in the App Store. You can access the URL to an application by simply right clicking the Application in iTunes and selecting the "Copy iTunes Store URL" menu item.

Here is the core code needed.

[[UIApplication sharedApplication]
 openURL:[NSURL
  URLWithString:@"http://itunes.apple.com/WebObjects/MZStore.woa/wa/viewSoftware?id=291170459&mt=8"]];

The above URL points to my Hiragana application.

I then chose to store the App Store URL in the info.plist file under a key named TEBAppStoreLink, so that I can use the same code for any future applications.

I ended up with this method for launching the App Store with the URL in the info.plist file.

- (void)goToAppStore
{
  UIApplication *app = [UIApplication sharedApplication];

  // Get the url from info.plist.
  NSString *appStoreLink = [[[NSBundle mainBundle] infoDictionary] objectForKey:@"TEBAppStoreLink"];

  // Open the url if it was available.
  if(appStoreLink){
  [app openURL:[NSURL URLWithString:appStoreLink]];
  }
}


What really happens is that Mobile Safari is launched with the provided URL, and upon realizing that the link is an App Store link it in turn launches the App Store application.

Of course, if you provide any other URL it just opens in Safari as usual. I haven't tested what happens if a YouTube URL is used, but I imagine the YouTube app would launch. That, however,  is not the problem i set out to solve today.